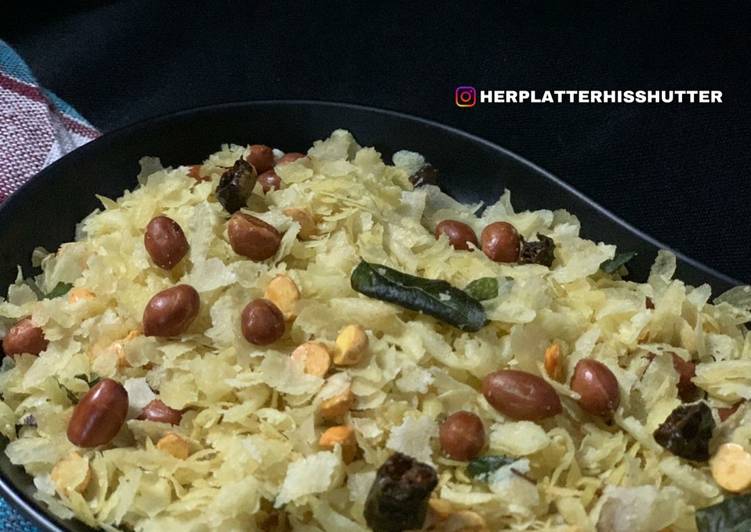
Hey everyone, I hope you’re having an amazing day today. Today, I’m gonna show you how to prepare a Best dish, poha chivda. It is one of my favorites. This time, I am going to make it a little bit unique. This is gonna smell and look delicious.
Poha Chivda is one of the most well liked of current trending meals in the world. It is appreciated by millions daily. It is simple, it’s fast, it tastes delicious. They are fine and they look wonderful. Poha Chivda is something which I have loved my whole life.
To begin with this particular recipe, we have to prepare a few ingredients. You can cook poha chivda using 13 ingredients and 6 steps. Here is how you cook it.
The ingredients needed to make Poha Chivda:
- Make ready for Poha Chivda-
- Prepare 2 cups thin poha (aval or flattened rice)
- Prepare 1/3 cup peanuts
- Make ready 1/3 cup roasted chana dal (roasted split chickpeas)
- Take 1/3 cup oil - for deep frying
- Take For Tempering Poha Chivda-
- Prepare 14-15 curry leaves
- Get 2 green chilies - sliced or chopped
- Prepare 1 generous pinch of asafoetida (hing)
- Take 1/4 tsp turmeric powder
- Prepare 2 teaspoons sugar or powdered sugar
- Get 1-1.5 teaspoons salt or add as required
- Take 1/2 tablespoon oil - for tempering
Instructions to make Poha Chivda:
- Roasting Poha For Chivda Recipe - Measure all the ingredients and keep them separately in a plate or bowl. - Heat a wide, thick-bottomed pan or kadhai with a handle. - Keep the flame to a low. Then add 2 cups of thin poha or rice flakes in it.
- Roast the poha. Gently shake the pan so that the poha gets evenly roasted, as constant stirring with a spoon might break the poha. Since they are papery, light and delicate. - Within 3 to 4 minutes the poha flakes will change their texture and become crisp. Don't roast the poha on a high flame. Since on a high flame, the poha may get browned or burned. - Don't brown the poha. Remove the roasted poha on a plate and place it aside.
- Frying peanuts For Poha Chivda - Heat oil for deep frying in a small pan or tadka pan. I have used a tadka pan. Alternatively, you could use a wide pan and use a fine sieve ladle to fry the nuts. - Add peanuts and fry them till they become crisp. Remove them with a slotted spoon. Place in another dish or bowl. - Now fry the roasted chana dal for some seconds, till they become crisp. Remove them with a slotted spoon. Place in the same dish or bowl.
- Tempering And Mixing Poha Chivda - - Heat ½ tablespoon of oil in the same pan or kadhai in which the poha flakes were roasted. Lower the flame. Add curry leaves, green chilies and a generous pinch of asafoetida. - Stir and saute, till the chilies and curry leaves become crisp. Saute on a low flame. - Then add sprinkle ¼ turmeric powder and 1 to 1.5 teaspoons salt or add salt as per taste. - Now add 2 teaspoons of powdered sugar or sugar.
- On a low flame, stir till the powdered sugar starts caramelizing. - Then add the roasted poha along with the fried ingredients - peanuts and chana dal. Shake the pan so that everything gets mixed. If stirring, the stir gently and lightly. - Saute for 4 to 5 minutes. Preferably shake & mix the chivda mixture by shaking the pan. If stirring, then gently stir. Don't apply too much force while stirring else the poha flakes might break.
- Switch off the flame. Let the poha chivda sit in the hot pan for 1 to 2 mins more. - Then remove the poha chivda in another plate and let it cool at room temperature. Once cooled, then store in an air-tight box and container. - Serve the chivda as a tea time snack.
So that is going to wrap it up for this Best food poha chivda recipe. Thank you very much for your time. I am sure you can make this at home. There is gonna be more interesting food at home recipes coming up. Remember to bookmark this page on your browser, and share it to your loved ones, friends and colleague. Thank you for reading. Go on get cooking!